

Handbook · Complete builds
How to build an 8 × 8 ft shed with a shed roof
An 8 by 8 ft shed on four piers: a timber floor, 2×4 walls, one slope of 2×6 rafters falling from the doors to the back, and a pair of doors. Every picture, size and count here is HausCrafter’s, from the shed as it is drawn.
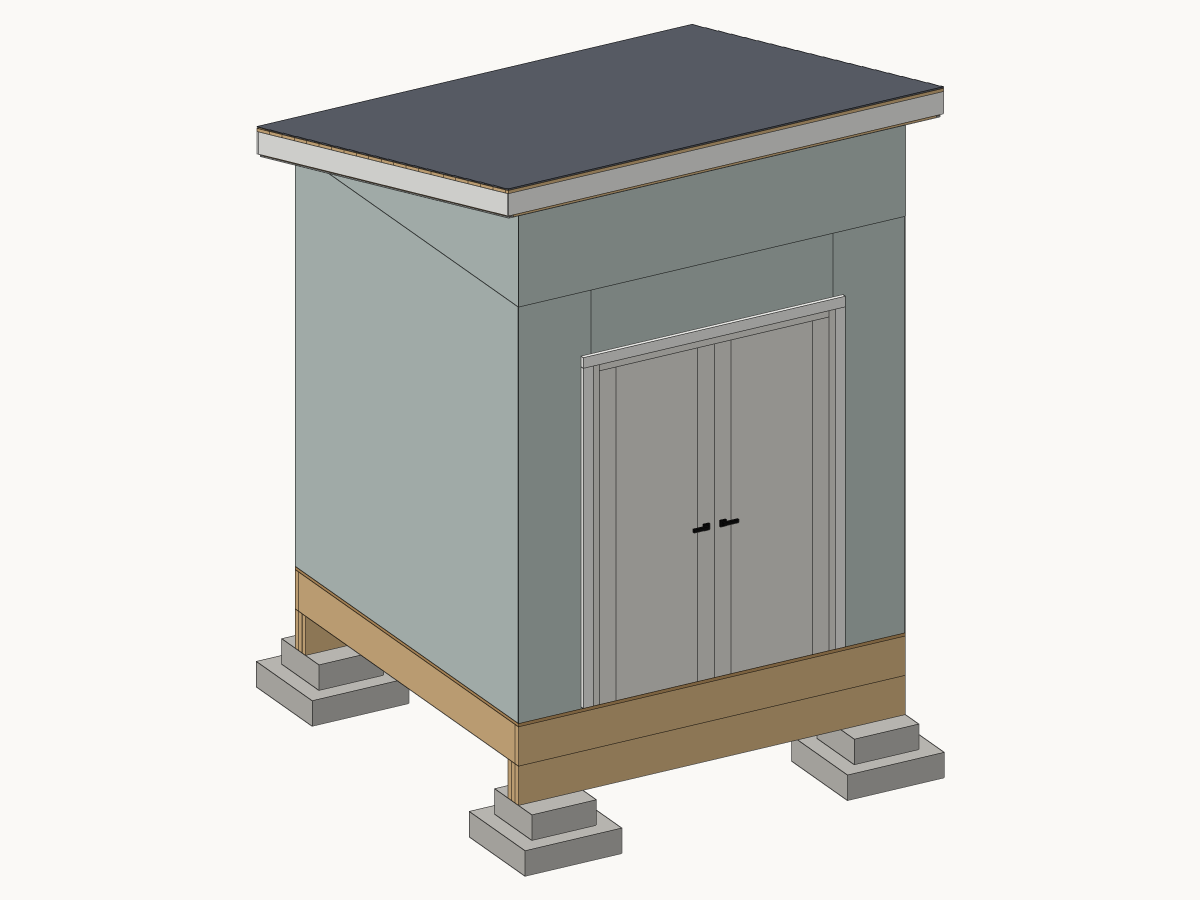
What to buy
Counted from the shed as it is drawn: lumber in feet, roofing in squares, and sheets and boards by the pieces they are cut to.
| Piece | Size | How much |
|---|---|---|
| footing | 4 pieces | |
| pier | 4 pieces | |
| floor rim | 2×10 | 32 ft |
| floor joist | 2×10 | 39 ft |
| beam ply | 6 pieces | |
| sole plate | 2×4 | 26 ft |
| top plate | 2×4 | 83 ft |
| stud | 2×4 | 223 ft |
| jack stud | 2×4 | 14 ft |
| header | 2×4 | 11 ft |
| header | 6 ft | |
| rafter | 2×6 | 46 ft |
| barge rafter | 2×6 | 19 ft |
| corner rafter | 2×6 | 8 ft |
| sub-fascia | 2×6 | 18 ft |
| lookout | 2×6 | 9 ft |
| siding | 6 pieces | |
| house wrap | 6 pieces | |
| sheathing | 16 pieces | |
| gable sheathing | 3 pieces | |
| gable cladding | 3 pieces | |
| roof decking | 31 pieces | |
| fascia | 4 pieces | |
| soffit | 4 pieces | |
| shingles | 0.83 squares | |
| brickmould | 3 pieces | |
| subfloor | 1 piece |
Step 1 of 7 · Foundations
Lay it out, and set the piers
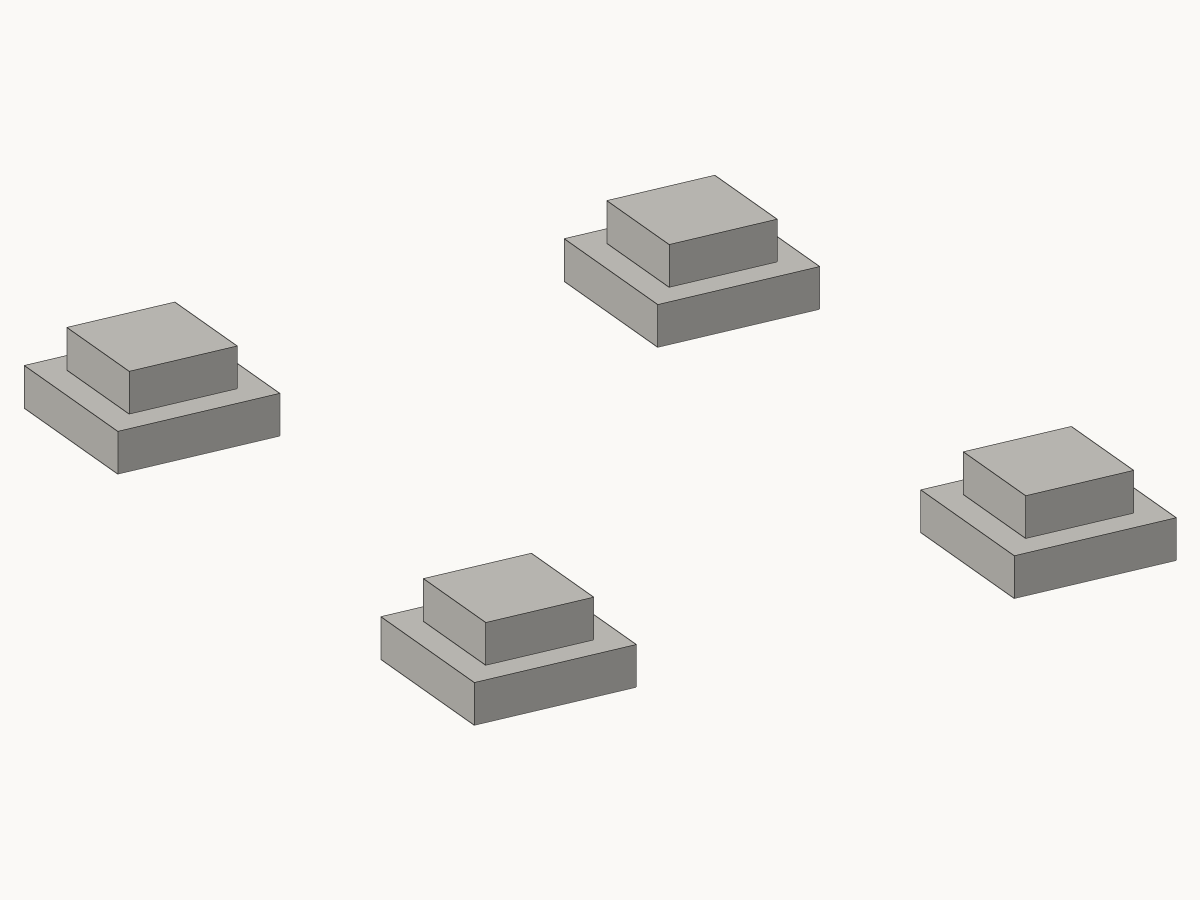
- Stake the shed’s four corners, 8 ft apart each way, and string lines between them. It is square when both diagonals measure the same, 11 ft 3 3/4 in.
- Dig a hole at each corner below your frost line, pour a footing in it, and set a pier on each: 4 footings and 4 piers.
- Bring the piers’ tops level with each other. A string and a line level across each pair will do it; the floor is only as flat as they are.
| Piece | How much |
|---|---|
| footing | 4 pieces |
| pier | 4 pieces |
Step 2 of 7 · Floors
Frame the floor
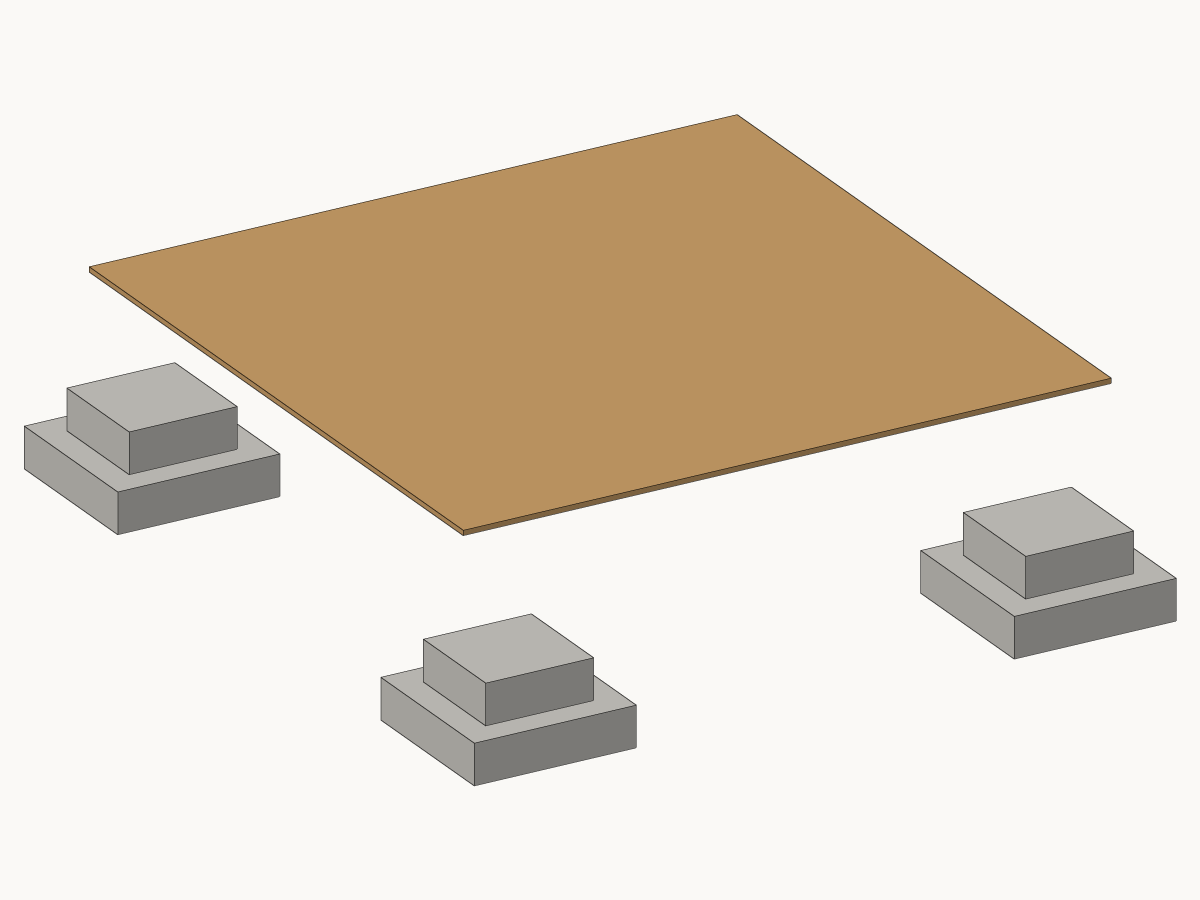
- Lay a beam across each pair of piers, and the floor across the beams: a rim of 4 boards round the outside, and 5 joists between them 16 in on centre, each nailed through the rim.
- Measure the frame’s diagonals as you did the strings, and rack it till they match before the subfloor goes on.
- Glue and screw the subfloor to the joists, its long edges across them.
| Cut | Piece | Size | Length |
|---|---|---|---|
| 2 | floor rim | 2×10 | 8 ft |
| 2 | floor rim | 2×10 | 7 ft 9 in |
| 5 | floor joist | 2×10 | 7 ft 9 in |
| 6 | beam ply | 2×10 | 8 ft |
Step 3 of 7 · Walls
Frame the walls and stand them up
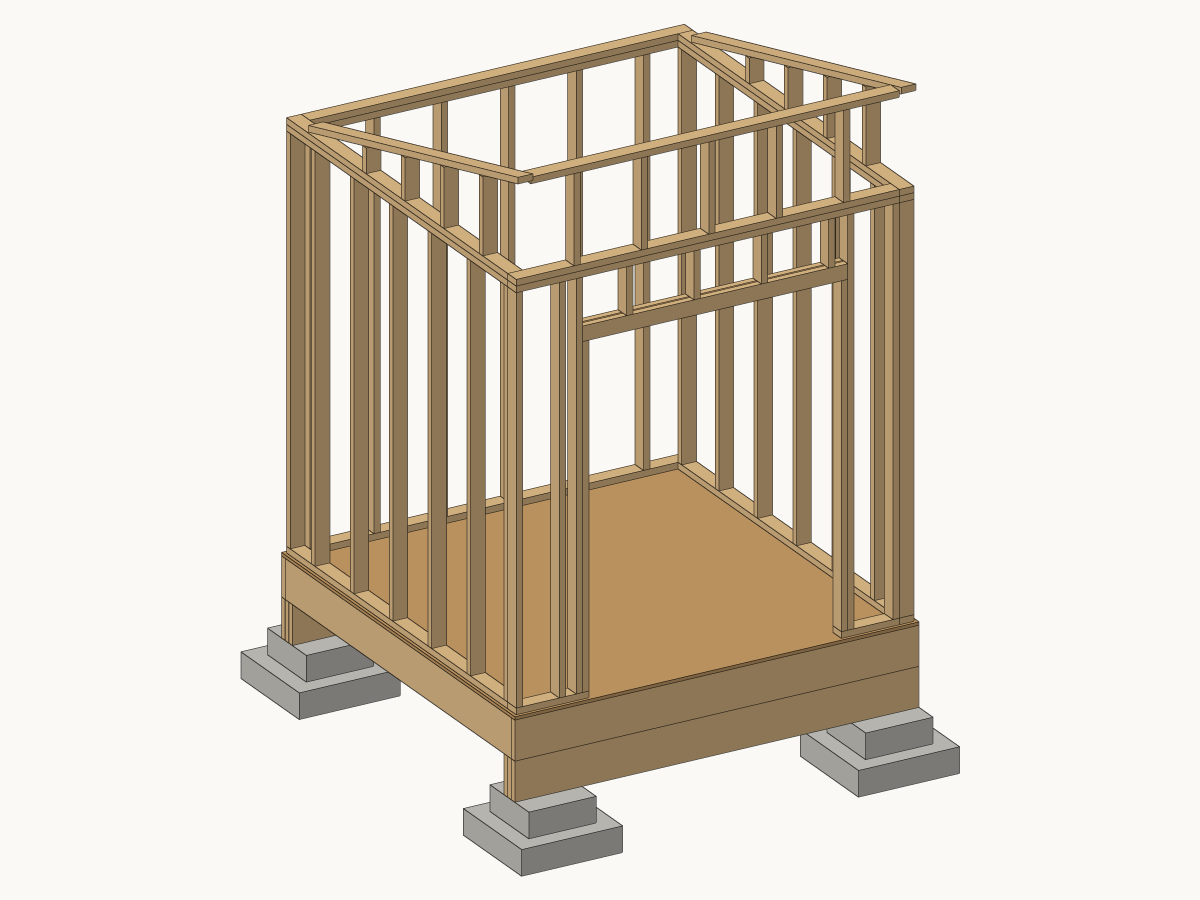
- Frame each wall flat on the floor: a sole plate, a top plate, and studs 16 in on centre between them, 43 studs in all. Stand it, plumb it and nail its sole plate down through the subfloor.
- The east wall is the high one. It stands 1 ft 10 1/4 in higher than the west, on a short wall framed over its plate, and the two end walls are framed up to the slope between them.
- Frame the doors’ opening 5 ft wide: a jack stud each side under a header, 2 jacks and 3 header pieces.
- Nail a second top plate over the first, lapping it over the corners to tie the walls together.
| Cut | Piece | Size | Length |
|---|---|---|---|
| 43 | stud | 2×4 | 5 13/16 in to 7 ft 9 1/2 in |
| 3 | sole plate | 2×4 | 7 ft 7 in |
| 1 | sole plate | 2×4 | 1 ft 5 1/4 in |
| 1 | sole plate | 2×4 | 1 ft 1 3/4 in |
| 8 | top plate | 2×4 | 7 ft 7 in |
| 2 | top plate | 2×4 | 7 ft 5 1/4 in |
| 1 | top plate | 2×4 | 7 ft 3 1/2 in |
| 2 | jack stud | 2×4 | 6 ft 7 in |
| 2 | header | 2×4 | 5 ft 3 in |
| 1 | header | 1/2 × 3 1/2 in | 5 ft 3 in |
Step 4 of 7 · Roofs
Set the rafters
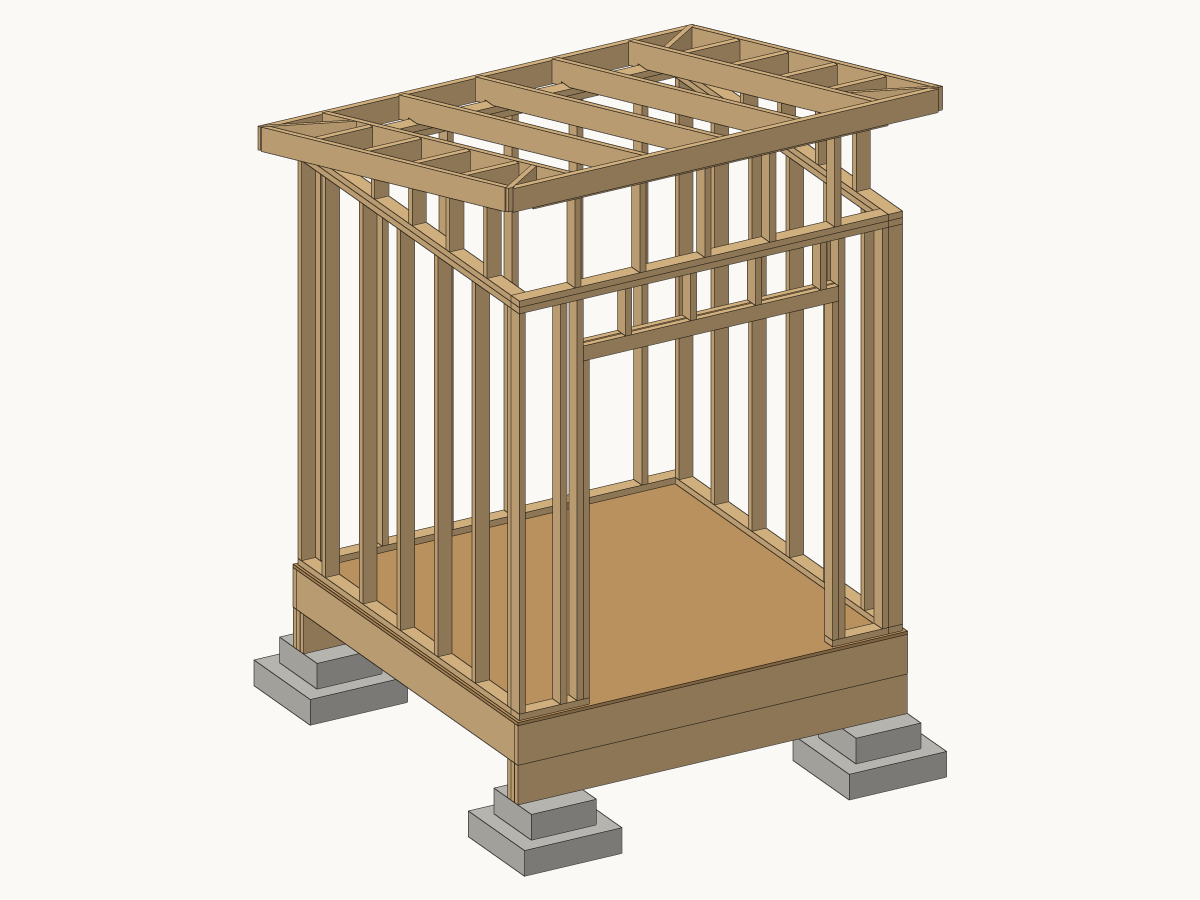
- Cut 5 rafters to the length below, notch each over both top plates, and nail them 24 in on centre from the low wall to the high one, running on 6 in past each.
- Close their ends with a sub-fascia at each eave, and run a barge rafter up each side on 8 lookouts.
| Cut | Piece | Size | Length |
|---|---|---|---|
| 5 | rafter | 2×6 | 9 ft 9/16 in |
| 2 | barge rafter | 2×6 | 9 ft 9/16 in |
| 4 | corner rafter | 2×6 | 1 ft 11 5/16 in |
| 2 | sub-fascia | 2×6 | 8 ft 8 7/8 in |
| 8 | lookout | 2×6 | 1 ft 1 1/2 in |
Step 5 of 7 · Siding & roofing
Sheathe, wrap and side the walls
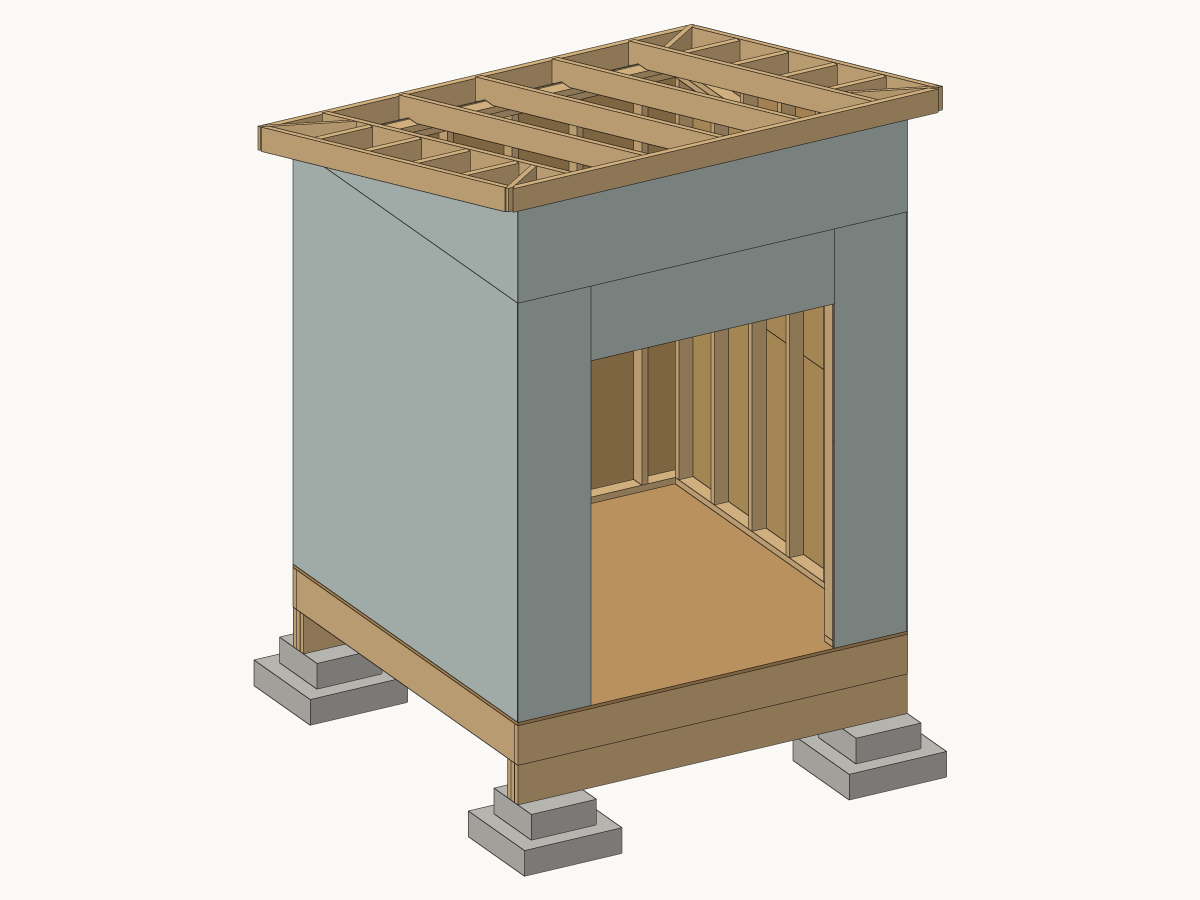
- Nail the sheathing to the studs in 4 × 8 ft sheets, standing up, each edge on a stud, and cut round the doors’ opening. The pieces below are what the sheets are cut to.
- Staple the house wrap over it, each course lapping the one under it, and hang the siding over the wrap from the bottom up.
| Piece | How much |
|---|---|
| siding | 6 pieces |
| house wrap | 6 pieces |
| sheathing | 16 pieces |
| gable sheathing | 3 pieces |
| gable cladding | 3 pieces |
Step 6 of 7 · Siding & roofing
Deck and roof it
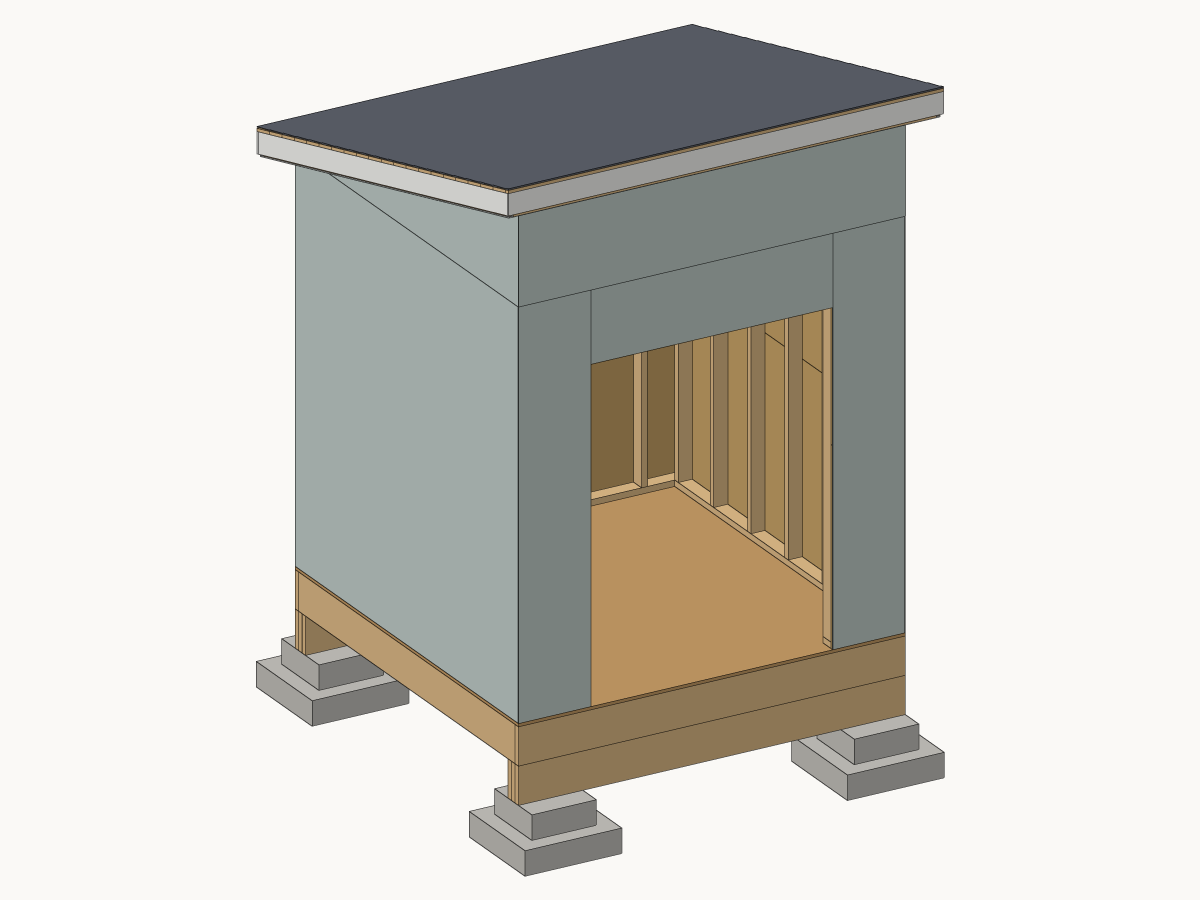
- Nail the roof decking across the rafters, its joints staggered, and the fascia over the sub-fascia and barge rafters.
- At 3 in 12, a shingle roof wants a double layer of underlayment under it. Your shingles’ maker says the least pitch they are good for, and what they ask under them.
- Shingle from the low eave up, each course lapping the one under it.
| Piece | How much |
|---|---|
| roof decking | 31 pieces |
| fascia | 4 pieces |
| soffit | 4 pieces |
| shingles | 0.83 squares |
Step 7 of 7 · Doors & windows
Hang the doors

- Hang a pair of doors 2 ft 6 in wide and 6 ft 8 in tall in the opening, each on three hinges, with an even gap round them and between them.
- Nail the brickmould round the opening outside, over the siding’s edge, and caulk it.
| Piece | How much |
|---|---|
| brickmould | 3 pieces |
Built and counted close enough to plan the shed and buy for it. Your local code, a span table and your permit office settle what each footing and board has to be.